 Pictius Free image editor in your browser
Remove blemishes and red eye
Spots, small scars, dust on the camera sensor, a stray hair or red eyes from the flash: these small distractions take seconds to remove with the retouching tools. Pictius has the Spot Healing Brush, the Healing Brush, Patch, Clone Stamp and Red Eye, and they all work in your browser, on your own device.
- Free
- No install, no account
- Images stay on your device
- Layers, masks and AI
Remove spots with the Spot Healing Brush
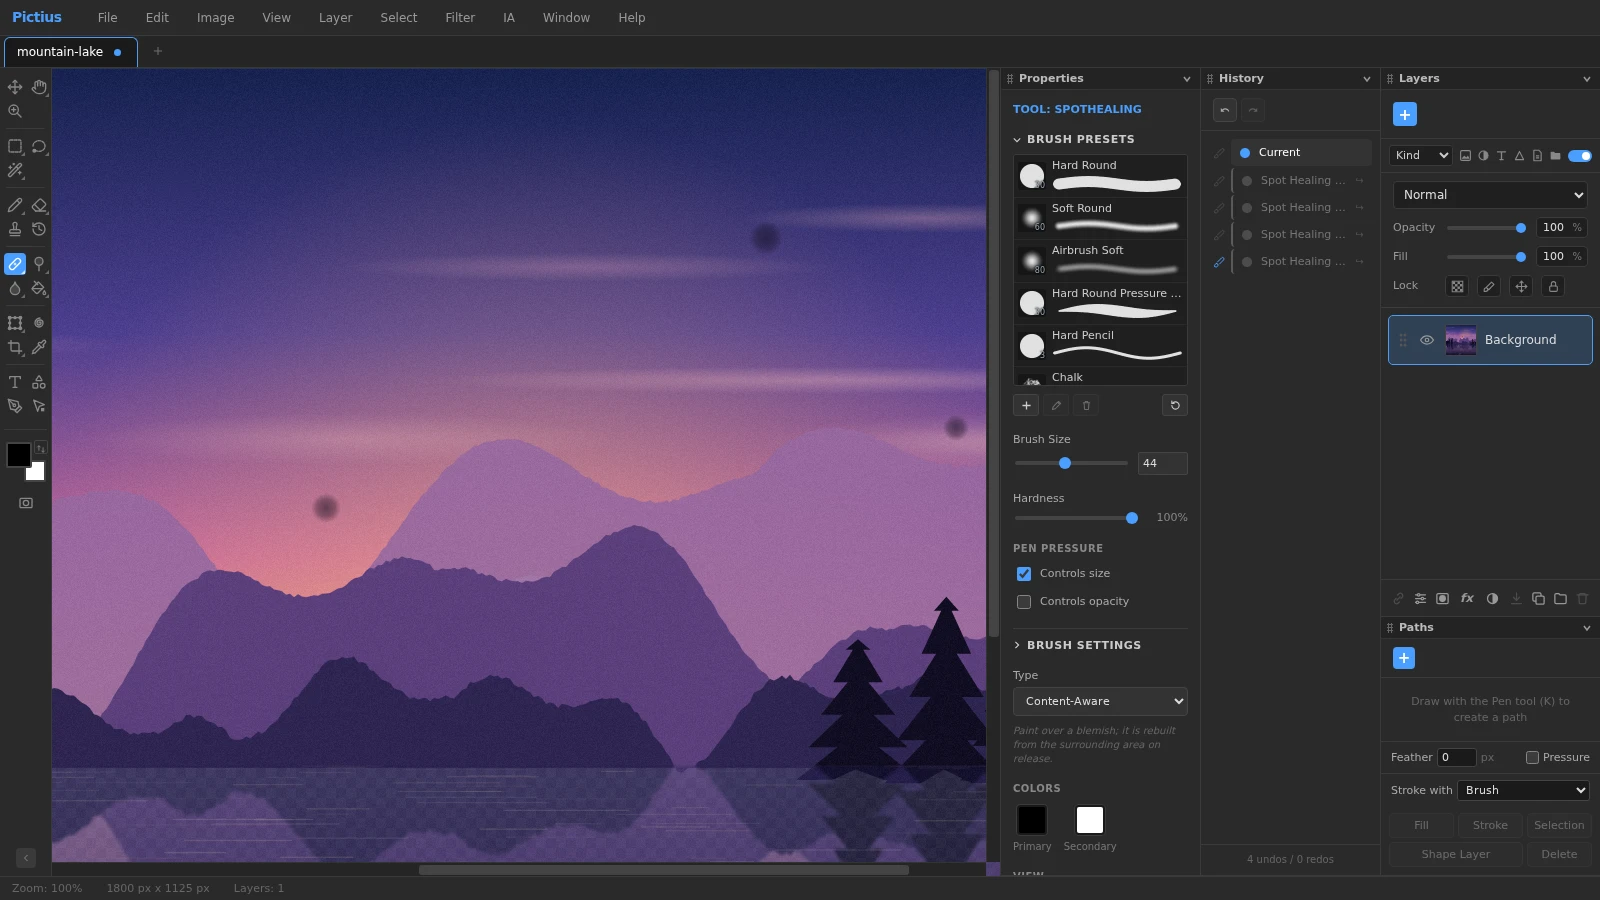
It needs no source point: you paint over the blemish and Pictius rebuilds it from the area around.
- Open the photo with File ▸ Open… (Ctrl+O) and zoom in with the Zoom tool (Z) or Ctrl+1 for 100%, so you can see each blemish clearly.
- Duplicate the layer with Layer ▸ Duplicate Layer. Hiding the copy shows the original, so you can compare at any time.
- Press J for the Spot Healing Brush. Pressing J again cycles through Healing Brush, Patch and Red Eye.
- Make the brush a little larger than the spot with [ and ] (hold Shift for bigger steps).
- Click on the spot, or paint along a longer mark. When you release, the area is rebuilt from its surroundings.
- If a result repeats a texture or smudges an edge, press Ctrl+Z and try a shorter stroke or another Type in the Properties panel.
The four Spot Healing types
- Content-Aware, the default: the same engine as Edit ▸ Fill, which builds the area from patches of its surroundings. The best general choice.
- AI: uses the AI Fill model. The first time, Pictius asks before downloading it (about 28 MB); it then runs on your device.
- Create Texture: blends the edges of the stroke and adds fine detail from nearby, which suits skin and fabric.
- Proximity Match: fills from the pixels right around the stroke, quick for small specks on smooth backgrounds.
Healing Brush, Patch and Clone Stamp
For larger areas, or when you want to choose where the replacement comes from:
- Healing Brush: Alt+click a clean area with a similar texture to set the source, then paint over the blemish. The texture comes from the source and the color and brightness from the spot you paint, so it blends in.
- Patch: draw around the blemish as with a lasso, then drag the selection to a clean area. On release, the selected area is rebuilt with the texture from there. Good for lines under the eyes or a stain on a wall.
- Clone Stamp (S): Alt+click to set the source, then paint to copy those pixels exactly. The distance to the source is kept for later strokes until you Alt+click again. Use it next to straight edges and patterns, which healing would soften.
Fix red eye
Choose Red Eye by pressing J until it is selected, or right-click the healing tools in the toolbar and pick it from the list. Click on each red pupil, or drag a box around the eye. Pupil Size changes how much of the pupil is corrected and Darken Amount how dark it becomes. If the click does not land on a round red pupil, nothing changes and a notice in the Properties panel explains why.
Frequently asked questions
Can I retouch on a separate empty layer?
No. These tools take their pixels from the layer you paint on, so an empty layer has nothing to copy from. Retouch a duplicate of the photo layer instead, and keep the original underneath.
Why does the healed area look smudged?
Usually the brush was much larger than the blemish, or the stroke crossed an edge with very different colors. Undo, use a smaller brush, and switch to Clone Stamp next to edges and patterns.
What is the difference between Spot Healing and Healing Brush?
The Spot Healing Brush picks the replacement by itself from the surrounding area. The Healing Brush copies the texture from a source point you set with Alt+click, which gives you control on busy areas such as skin next to hair.
Does Red Eye work on pets?
It looks for red pupils, so the green or yellow glow in many animals’ eyes is not detected. Paint over it with the Brush (B) in a dark color at low opacity instead.
Are my photos uploaded for retouching?
No. Every retouching tool runs in your browser, on your own device. Only the AI type downloads a model, once, and your photo is never sent anywhere.
Image editing guides
- Remove the background from an imageRemove the background from a photo in your browser: select the subject with AI, refine the edges with a layer mask and export a transparent PNG. No uploads.
- Remove objects from a photoErase unwanted objects, people or text from a photo: select them and use Content-Aware Fill, AI Fill, Spot Healing or Patch. Everything runs in your browser.
- Cut out hair and objects preciselyCut out people, hair, pets and products: start with Quick Selection or Select Subject, refine the edge in Select and Mask and output a layer mask or a new layer.
- Blur the background of a photoBlur the background of a photo to make the subject stand out: use Portrait Mode, or select the subject and apply Gaussian Blur to the rest. Free, in your browser.
- Resize an imageResize an image to exact pixels or a percentage with Image Size, choose the resampling method, and add or trim space around it with Resize Canvas. Free and private.
- Crop and straighten a photoCrop a photo to a ratio such as 1:1, 4:5 or 16:9, straighten a tilted horizon, fix perspective with Perspective Crop and trim empty borders. Free, in your browser.
- Upscale an imageEnlarge a small image with Super Resolution 2x, which doubles its size with smooth interpolation and sharpening, or pick an exact size and method in Image Size.
- Convert an image to another formatConvert images in your browser: open PNG, JPG, WebP, AVIF, GIF or PSD files and export PNG, JPG, WebP, GIF, SVG, PDF or TIFF with the quality and scale you choose.
- Images at the right size for social mediaMake images at the right size for Instagram, Facebook, YouTube and more: crop to a preset ratio or use Export for Social Media to resize and save in one step.
- Open and edit PSD files onlineOpen PSD files in your browser with their layers, groups, masks, adjustment layers and effects, see what is kept or approximated, and export PSD, PNG or JPG.
- Add text to an imageAdd text to a photo with editable text layers: set font, size, color and spacing in the Character and Paragraph panels, then add a shadow or stroke with Layer Style.
- Add a watermark to your photosAdd a text or logo watermark to a photo, set its opacity and blend mode, then record it as an Action and apply it to many images at once with Batch.
- Adjust color and exposureFix dark, flat or off-color photos with Levels, Curves, Hue/Saturation and Shadows/Highlights, and keep every edit reversible with adjustment layers.
- Layers and masks explainedLearn layers in Pictius: groups, blend modes, layer masks and clipping masks, adjustment layers, and .pictius project files that keep every layer editable.
- Batch edit images with ActionsRecord your edits once as an Action and play it on many images with Batch: resize, adjust, watermark and export them all in one go, right in your browser.